First steps with Joyent's container service
As a developer, Dockerizing an app is a convenient way of ensuring the software runs the same way everywhere it's used. People who are already using Docker need no introduction, but for those not familiar with Docker, let me say that it's a great way to run software without worrying about the complexity of installing it or the frustrations of how it works in different environments. It's especially convenient on a laptop with Boot2docker.
Our customers have been running Docker containers on VMs in the Joyent cloud since Docker's earliest days, but to make it even easier we launched our turnkey Docker container service in late 2014. To experience the ease and power of running Docker containers on the Joyent cloud, simply follow the steps below.
Update: we introduced the Triton Elastic Container Service, our high-performance, container-native Docker offering in March. This post is specific to our first-generation offering and there are a number of differences between the two.
Connect to the remote Docker daemon
Docker hosts launched in the Joyent cloud are preconfigured for secure remote access to the Docker API. If you haven't already created a Docker host, please do so, as the following all assume you've got one or more.
Install the CLI tools
- Install Docker. We'll be running the
dockercommand in client mode to connect to the remote docker host. - Install CloudAPI CLI tools. We'll use these to get information about machines in the Joyent cloud, though we could also provision new machines with it.
- Install the Manta CLI tools. Manta is Joyent's object store.
Download the TLS certs and keys
Joyent generates the keys and securely stores them in Manta, the Joyent object store. I'm showing three different ways to get the keys to demonstrate different ways of using the Manta CLI tools:
Get each file in a separate request
mget -O ~~/stor/.joyent/docker/ca.pemmget -O ~~/stor/.joyent/docker/cert.pemmget -O ~~/stor/.joyent/docker/key.pemOr, find and download all *.pem keys at once
mfind -t o -n '.pem$' ~~/stor/.joyent/docker | xargs -L 1 mget -OThe problem with this method is that it downloads three keys we need and three keys we don't.
Or, find the three specific keys we need and download them in a single go
mfind -t o -n '^(ca|cert|key)\.pem$' ~~/stor/.joyent/docker | xargs -L 1 mget -OThe Manta CLI utilities reference is the place to look for more background of the mget and mfind commands used above.
Set Docker's environment vars
export DOCKER_CERT_PATH=.unset DOCKER_TLS_VERIFYThose variables will temporarily replace any existing environment variables set by boot2docker or in your .bash_profile.
Get the IP address of the Docker host
Again, there are a few ways of doing this. The following three introduce both the portal GUI and the API CLI tools.
Get the IP from in the portal
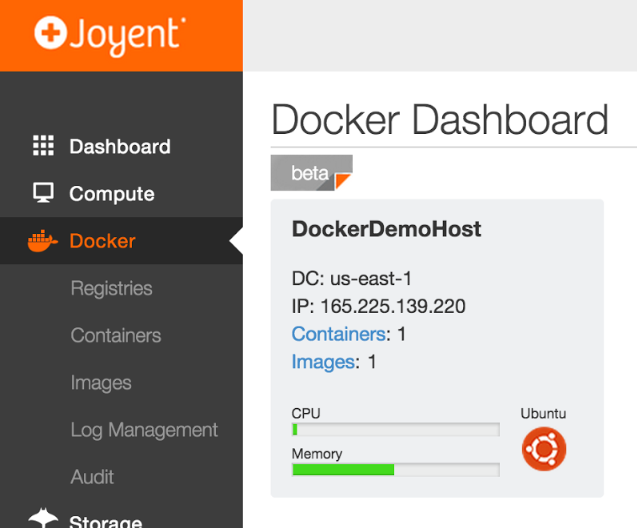
The public IP for each Docker host is shown in the Joyent client portal.

Or, use CloudAPI to get a list of all the details for each Docker host
sdc-listmachines -u https://us-east-1.api.joyentcloud.com --tag JPC_tag=DockerHostReplace -u https://us-east-1.api.joyentcloud.com with the URL to the (datacenter|availability zone) with one or more Docker hosts.
Or, get a smaller report of just the machine ID, name, and public IP of each Docker host
Piping sdc-listmachines's output to json will give us just the information we need in a more human-readable form.
sdc-listmachines -u https://us-east-1.api.joyentcloud.com --tag JPC_tag=DockerHost | json -a id name primaryIpThe CloudAPI docs explain the whole range of API methods available.
Poke the remote Docker host
Let's test what we've got so far.
Get the remote Docker info
docker -H tcp://165.225.139.220:4243 --tls infodocker -H tcp://165.225.139.220:4243 --tls ps -aReplace the IP number in -H tcp://165.225.139.220:4243 with the IP of your Docker host. Joyent runs the daemon on port :4243.
Run a test container
docker -H tcp://165.225.139.220:4243 --tls run busybox echo "Ahoy Matey"Maybe upgrade the Docker daemon
If you get the following error when trying to connect to the Docker daemon, you'll need to upgrade the Docker host.
FATA[0000] Error response from daemon: client and server don't have same version (client : 1.16, server: 1.15)You can destroy the Docker host and create a new one, or upgrade using the following commands.
First, ssh into the Docker host
ssh ubuntu@165.225.139.220Once logged in, let's upgrade:
sudo apt-get install lxc-docker-1.4.1With that done you can carry on with the tests outlined above.
Now let's do something interesting
Docker containers aren't all test and no production. One of my favorites is OpenVPN, containerized and originally documented by Docker's own Jérôme Petazzoni.
OpenVPN is a good solution for securely tunneling communications through unknown and possibly insecure networks. Take a look at the Wikipedia entry for more details about the software and Jérôme's for more details of how he containerized it.
Start the OpenVPN daemon container
The following command will start the container and set the container ID in a variable.
DCID=$(docker -H tcp://165.225.139.220:4243 --tls run -d --privileged -p 1194:1194/udp -p 443:443/tcp jpetazzo/openvpn)Eagle-eyed readers will spot the $DCID var in the next command.
Get the configuration
Rather than document how to construct a client configuration file, the container includes a feature to generate the file. Use the following docker run command as the first step:
CCID=$(docker -H tcp://165.225.139.220:4243 --tls run -p 8080:8080 --volumes-from $DCID jpetazzo/openvpn serveconfig)The above command will echo out a URL. Visit that URL in a web browser or use curl to download the configuration, then use that with client app to improve network security when surfing from coffee shops.
Once you've downloaded the client config file, be sure to kill and remove the container you used to generate it:
docker -H tcp://165.225.139.220:4243 --tls rm -f $CCIDIf you don't delete that container, others could find the URL, download the config, and use your shiny new VPN or VPN keys. That's probably not the security you're looking for.
Connect to the VPN
The VPN doesn't do much until you connect a client to it. I'm an especially big fan of the iOS app, which I run pretty much constantly as a prophylactic against shady WiFi and snooping by the access provider. The little VPN badge in my phone's status bar makes me happy:

Version history
- March 25: Updated with Triton branding, see announcement blog posts from Bryan Cantrill and Casey Bisson.
Post written by Casey Bisson


